A guide to using NoScript 10.x
When Firefox 57 arrived, NoScript 5 users were left with the unsettling reality of not being able to selectively filter JavaScript until the next version was released, a week or so later. Worse, its release was poorly received, due to bugs and a brand new UI. Now that the dust has settled, and the bugs have been vanquished, NoScript users are still presented with the foreign UI and little to no official documentation. This post will serve as a guide for both old and new NoScript 10 users to get up to speed.
The trust levels
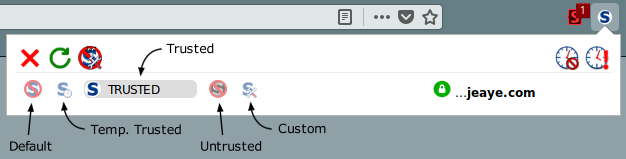
Each domain in NoScript 10 has a trust level. By default, each domain is under the Default trust level, but you may find your old NoScript domains already under the Trusted level. These are familiar to previous NoScript users: the default is not to allow JavaScript, but domains can be explicitly Trusted or Temporarily Trusted. NoScript 10 also adds two more levels: Untrusted and Custom.
Though the UI makes this a bit unclear, these trust levels are columns. For each domain, one button is selected, meaning one trust level.
Editing trust levels
Each trust level can be edited to describe what happens when you set a domain to that level. For Default, Temporarily Trusted, Trusted, and Untrusted, that configuration is global. That is, you you say that the Default trust level should trust fonts (by checking the fonts checkbox), but nothing else, then every domain in that trust level will have that setting. When you modify the Custom trust level, it’s per-domain.
To edit a global trust level, enter the NoScript settings page by clicking the settings button in the NoScript menu.

Once you’re there, you can specify the global properties for each trust level. Note that the properties for Temporarily Trusted reflect whatever you have set for Trusted. The only difference is that Temporarily Trusted domains are only trusted for the current session.

Safe defaults
NoScript 10 allows for more control over what’s filtered. Scripts, objects, media, frames, fonts, WebGL, fetch, and other things can all be filtered. Since you’re using NoScript for privacy, I recommend changing your Default trust level to uncheck all items. If you trust a domain completely, add it to the Trusted level. If you only want some items from it, like fonts and WebGL, then use a Custom trust level for that domain.

Top-level domain configuration
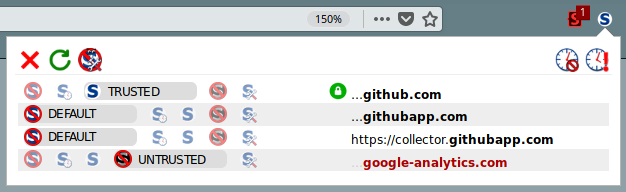
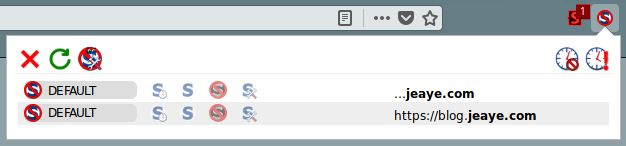
When browsing sites and using NoScript 10, you’ll likely notice that a domain will show up multiple times within the NoScript menu. This is because NoScript 10 allows you to modify the trust level of the specific domain used (such as blog.jeaye.com), as well as the entire top-level domain (such as …jeaye.com). If you set a top-level domain to a specific trust level, that trust level will apply to all sub-domains as well. This is very handy for marking entire ad/tracking domains as Untrusted.
Permanent trust levels
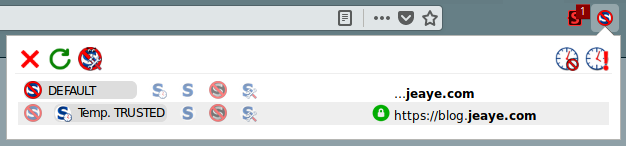
When getting a site to work, I recommend only marking the domains as Temporarily Trusted. Once the site is in working condition, you can upgrade them to permanently Trusted. If you don’t plan on returning to the site often, consider leaving the trust level temporary.
Trusting HTTPS only
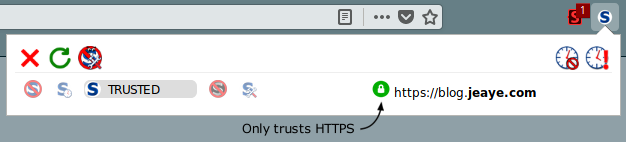
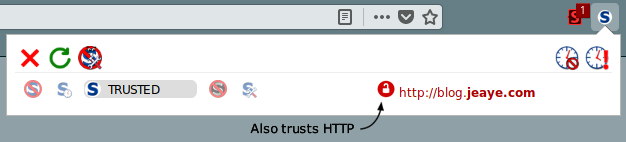
NoScript 10 provides the ability to trust a domain only if it’s through a secure connection. You can tell if this is enabled by whether or not the lock, which appears on that domain’s row, is green or red. If it’s red, then the domain will be trusted even through unencrypted connections. This is a concern, since unencrypted connections are vulnerable to MITM attacks and you may be trusting arbitrary and nefarious JavaScript. I recommend making sure the lock is always green (you can click on the lock to toggle it).
Note: If the site only works through HTTP, then trusting HTTPS only will effectively change the site’s trust level back to Default. You may need to keep the lock red for trusted sites which only use HTTP, but you should think twice about trusting anything over HTTP.
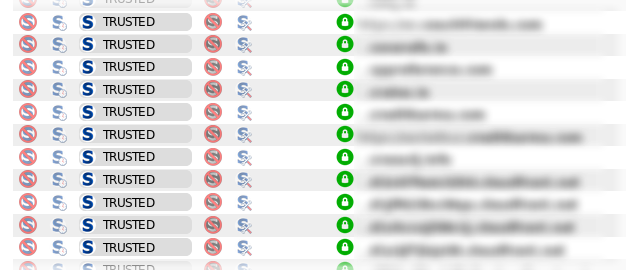
For previous NoScript users, I also recommend going back through your whole trusted list and setting all domains to have a green lock. You can get to that list by clicking the options button within the NoScript menu. There isn’t an automatic process for marking them all green yet, but it only took me 10 minutes or so to both ensure all locks are green and do some cleaning of old domains I no longer need to trust.
The remaining UI
With all of that covered, the only two remaining buttons are for revoking all temporary permissions and temporarily trusting the whole page. You can mouse over each of them to see a tool tip for what they do; it’s analogous to the previous NoScript’s behavior. Finally, at this point, you know all you need to effectively use NoScript 10. Don’t leave home without it!